

How to Clean and Care for Your Hearing Aids at Home
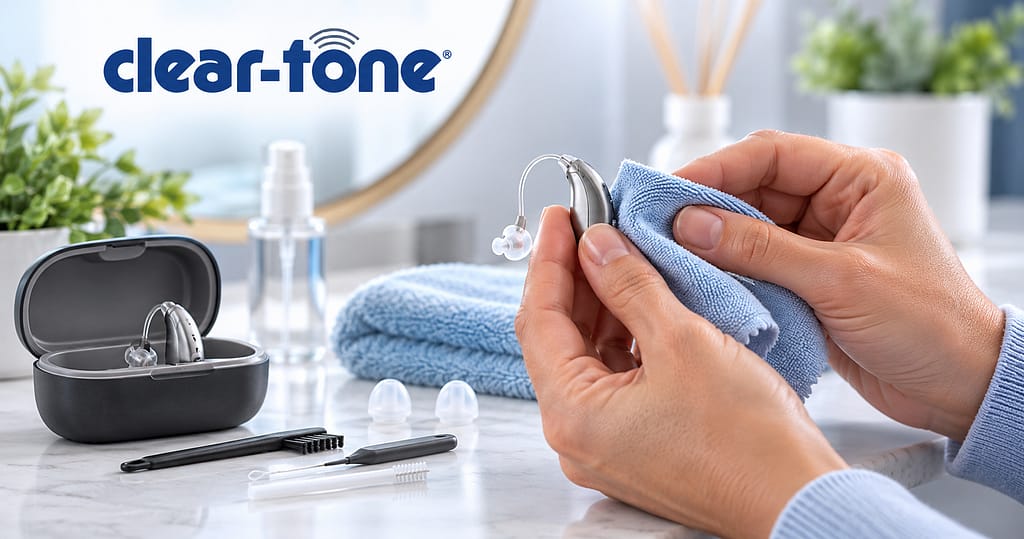
Cleaning your hearing aids takes about two minutes a day and prevents the vast majority of problems that send devices to the repair bench. Here is exactly how to do it for each hearing aid style, which tools you need, and what to avoid with your devices.
Why Daily Cleaning Matters More Than You Think
Hearing aids spend their working life in one of the most hostile environments in the human body: warm, humid, and lined with skin that produces both wax and oil. Three things account for nearly every non-accidental hearing aid failure: earwax, moisture, and skin oils.
The numbers are striking. According to an analysis published in The Hearing Review, Knowles Electronics, one of the largest manufacturers of hearing aid receivers, found that more than 60 percent of damaged receivers were tied to wax or debris blocking the receiver or its port. Cerumen (earwax) and moisture reaching the receiver, microphone ports, or tubing are the primary reasons devices come back for repair.
That is worth sitting with for a moment. The most common reason a hearing aid stops working is not a manufacturing defect or a dropped device. It is a buildup you could have brushed away in thirty seconds.
These failures also tend to be gradual. Your hearing aids do not usually die overnight. They get quieter, then muffled, then intermittent, and because the decline is gradual, many people assume their hearing has gotten worse when the actual problem is a wax-clogged ear canal.
A short daily routine prevents most of it.
Hearing Aid Cleaning Tools You Need (and What Never to Use)
The Basic Kit
You do not need much, and most of it came in the box with your devices:
- A soft-bristled brush: for microphone ports and the shell. Many brushes have a wax loop on the opposite end.
- A wax pick or wire loop: for clearing the sound outlet on custom devices.
- A dry, lint-free cloth: microfiber works well. Keep it dedicated to your hearing aids.
- Replacement wax guards: small filters that sit in the sound outlet. Buy the type matched to your specific model.
- Replacement domes (for RIC and open-fit devices): these are consumables, not permanent parts.
- A hearing aid dehumidifier or drying case: optional but genuinely worth it, especially through an Oklahoma summer.
What to Avoid
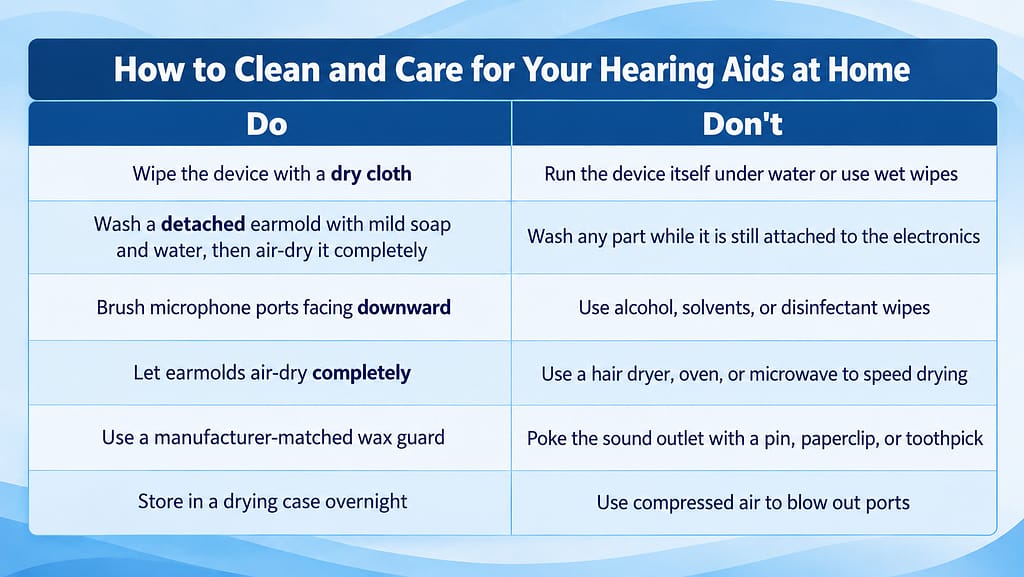
This list matters more than the one above because the wrong “cleaning” method can cause damage that a wax blockage never would.
| Do | Don’t |
| Wipe the device with a dry cloth | Run the device itself under water or use wet wipes |
| Wipe earmolds with a dry cloth, and leave BTE tubing and earmold cleaning to your provider | Wash any part while it is still attached to the electronics |
| Brush microphone ports facing downward | Use alcohol, solvents, or disinfectant wipes |
| Let earmolds air-dry completely | Use a hair dryer, oven, or microwave to speed drying |
| Use a manufacturer-matched wax guard | Poke the sound outlet with a pin, paperclip, or toothpick |
| Store in a drying case overnight | Use compressed air to blow out ports |
Two of these deserve extra emphasis. Alcohol dries and cracks the plastic housing and can degrade the seals around the microphone. And compressed air can drive wax and debris further into the receiver rather than removing them, turning a two-minute fix into a repair.
How to Clean Behind-the-Ear (BTE) and Receiver-in-Canal (RIC) Hearing Aids
Both styles keep the electronics behind your ear, with tubing and an earmold (BTE) or a thin wire and a dome (RIC) carrying sound into the canal. That earpiece is where wax builds up. Each style is cleaned differently at home, so follow the routine that matches yours, along with any instructions from your manufacturer.
Clean them at night over a towel-covered table so a dropped device doesn’t land on tile.
Behind-the-Ear (BTE): Wipe Daily, Bring It In for Tubing Care
BTE tubing has to be inspected for cracks and replaced once it stiffens or yellows, and that is not a home job. Your routine at home is short.
- Wipe the body with a dry cloth, including the underside where skin oils collect.
- Brush the microphone ports facing down, so gravity pulls debris out of the device.
- Wipe the earmold with a dry cloth. Clear any visible wax and leave the tubing connected.
Important — leave the tubing to us. That is the whole home routine. Instead of detaching the tubing and washing the earmold yourself, bring the devices in so we can inspect the tubing and replace it if needed. A blocked earmold or muffled sound is a reason to come in, not a reason to dig at it.
Receiver-in-Canal (RIC): Clean the Body, Swap the Dome
- Pull the dome off the receiver wire. Work gently; the wire is delicate.
- Wipe the body with a dry cloth, including the underside where skin oils collect.
- Brush the microphone ports facing down. This is where people go wrong: gravity should pull debris out of the device, not into it.
- Wipe the dome, and replace it if it is discolored, stiff, or torn. Domes are inexpensive and meant to be swapped regularly.
- Make sure everything is dry before reconnecting.
How to Clean In-the-Ear (ITE), ITC, and CIC Hearing Aids
Custom in-the-ear styles sit entirely in the ear canal or bowl, which puts the electronics in direct contact with wax. These need the most consistent attention.
Clear the sound outlet with the wax pick.
Use the wire loop to lift wax out of the opening, working from the edge inward. Never push a tool deep into the opening; you can damage the receiver behind it.
Brush the microphone opening, facing downward.
Same principle as above: let gravity do the work.
Wipe the shell with a dry cloth.
Pay attention to the seam where the faceplate meets the shell, and around the battery door.
Replace the wax guard on schedule.
Most manufacturers suggest every one to four weeks, but this depends entirely on how much wax you produce. If the sound drops off and comes back after a guard change, you have found your interval and may need to change it more often than the box suggests.
If you are not sure which style you wear or you are weighing a switch, our overview of hearing aid styles breaks down how each one fits and performs.
Weekly and Monthly Hearing Aid Maintenance That Prevents Repairs
Daily cleaning handles the surface. These checks catch the problems that build slowly.
Weekly
- Inspect tubing for cracks, stiffness, or yellowing. Tubing hardens with age, which changes its sound and eventually causes it to split.
- Check battery contacts for corrosion or green residue.
- Look for domes, tears, or permanent deformation.
- Leave the battery door open overnight to let moisture escape (disposable-battery models).
Monthly
- Replace wax guards, whether or not you think they need it.
- Give devices an extended session in a drying case, and bring BTE devices in so the tubing and earmolds can be professionally cleaned and checked.
- Replace domes as a matter of routine.
Every three to six months
- Have your devices professionally cleaned and checked. A clinic can safely reach places you cannot: vacuuming the receiver, replacing tubing, and checking output against your prescription to confirm the devices are still performing to spec.
If something isn’t working right, our hearing aid repair service handles most common issues.
Moisture, Heat, and Storage: What Shortens Hearing Aid Life
Oklahoma summers are hard on hearing aids. Humidity plus heat plus sweat is the exact combination that corrodes contacts and fogs microphones.
- Never store devices in a bathroom. Shower steam is the single most common source of avoidable moisture damage.
- Never leave them on a car dashboard or a sunny windowsill. Interior car temperatures in a Tulsa July can climb well past what the plastics and batteries are rated for.
- Use a drying case or dehumidifier every night. This is the highest-value habit on this page for anyone who sweats, works outdoors, or exercises regularly.
- Remove them before showering, swimming, or washing your face. Water-resistance ratings help with sweat and light rain. They are not permission to submerge a device. If your routine involves a lot of water, waterproof hearing aids are worth considering.
- Rechargeable models: follow your manufacturer’s guidance on long-term storage. If you will not be wearing them for an extended period, most makers recommend against leaving them on an unpowered charger indefinitely. Our guide to rechargeable hearing aids covers battery care in more detail.
When to Skip DIY and Bring It to a Professional
Home cleaning solves most problems. These are the signs it will not:
- Feedback or whistling that persists after cleaning and a fresh wax guard, often a fit issue, not a wax issue.
- A cracked case, a loose battery door, or a receiver wire that has pulled at the connection.
- Replacing the wax guard and dome does not resolve the poor sound quality.
- Visible corrosion on the battery contacts.
- Intermittent sound (cutting in and out), which usually points to moisture inside the device.
If any of these suggest something beyond routine maintenance, our guide to choosing between an audiologist and a hearing aid specialist covers who to see and why it matters.
Do not attempt to open the housing. The internal components are not user-serviceable, and opening a device typically voids the manufacturer’s warranty.
Clear-Tone Hearing Aids provides hearing aid cleaning, adjustments, and repairs for patients across the Tulsa area, with same-day service available for most common issues. Call (918) 493-4000 to bring in your devices.
Frequently Asked Questions
How often should I clean my hearing aids?
Wipe and brush them daily, ideally at night when you take them out. Do a thorough weekly inspection of tubing, domes, and battery contacts, and replace wax guards monthly or as needed, depending on how much wax you produce.
Can I use alcohol wipes on hearing aids?
No. Alcohol dries out and cracks the plastic housing over time and can damage the seals protecting the microphone. Use a dry, lint-free cloth. If you want a disinfecting option, use cleaning wipes made specifically for hearing aids.
How do I know when to replace the wax guard?
The usual sign is sound that becomes quiet, muffled, or drops out entirely in one device. If a fresh wax guard restores the volume, the old one was blocked. Most people land somewhere between one and four weeks.
Should I remove my hearing aids before showering?
Yes, always, and before swimming, washing your face, or using a sauna. Water-resistance ratings are designed for sweat and light rain, not immersion or steam.
How long should hearing aids last with proper care?
Most hearing aids last roughly three to seven years. Consistent cleaning, nightly drying, and regular professional maintenance push devices toward the upper end of that range. Neglect pushes them toward the lower end, often through repeated repairs.
Why do my hearing aids sound quiet even after cleaning?
Check the wax guard first, then the dome, then the battery or charge level. If all three are fine and the sound has not returned, the receiver may be internally blocked, or your hearing may have changed. Both are reasons to schedule a check.
Where can I get my hearing aids professionally cleaned in Tulsa?
Clear-Tone Hearing Aids provides professional cleaning and maintenance checks at our Tulsa office on S. Sheridan Road. Call (918) 493-4000 to arrange a visit.
Do I need to clean hearing aids I only wear occasionally?
Yes. Devices that sit unused still collect moisture and dust, and batteries can corrode in place. Store them in a drying case with the battery door open, and wipe them before each use.